

Total Solar Eclipse: Lessons Learned and Tips for Astrophotography

Disclaimer: The links I recommend in this article are not affiliate links. All photos in this article are my property: I do not authorize their reuse, whether for commercial or non-commercial purposes, without my explicit prior written consent.
Every year, I go on vacation to Spain, to my family’s hometown in the Valencian Community. This year, I was lucky enough that the total solar eclipse on August 12, 2026, has been perfectly centered over this place that is so dear to me.
Admittedly, solar eclipses aren't rare, but those that actually occur over land (rather than in the middle of the ocean), in a country that welcomes tourists, and especially in Europe, are.
In this article, I’ll explain the process I used to take the photos of this event. For me, this was my very first attempt at astrophotography: after doing a great deal of research, I decided that I, too, would like to help future photographers who are looking to capture such images.
I rarely talk about topics outside of my line of work (wedding films) but this event, in my opinion, deserved its own article.
Where should you go to photograph the eclipse?
First, you'll need to think about the kind of photo you want to take: a close-up of the sun, or a wide shot of the scenery. The tips below apply to both, but in my opinion, the choice of location is even more important for the wide shot, since it will be visible in the final result.
I invite you to visit the website https://theeclipse.app/, which is extremely helpful. It shows you the exact path of the eclipse, key times to help you plan, and lets you see which shadow zones to avoid.
Whether you want to experience the total eclipse or, more easily, the partial eclipse, this website will give you the practical tools (for free) to find the perfect spot for you.
As an introvert, for me, the ideal is to choose a place that won’t be overrun with tourists, away from the crowds. I know that for some people, it’s the shared experience that makes the moment incredible, but I have to admit I prefer to be alone or surrounded by just a few people.
Your location should therefore meet the following criteria:
Don't be in a shadowed area during the eclipse: otherwise, you won't be able to see the sun (this may seem pretty obvious, but just in case).
Check to make sure the sun will be high enough relative to your chosen vantage point: for example, the sun was predicted to be around 5° above the horizon in Spain during the August 12 eclipse, and that is very close to the horizon. If you were in a mountainous area, you would therefore need to consult maps and conduct on-site reconnaissance under actual conditions to verify that the sun would indeed be well above any significant elevation.
Choose a location with good weather: if it's cloudy or the weather is bad, it will be hard to see the sun, and therefore, the eclipse. Even though the weather is always unpredictable, you'll probably have more sunshine in Spain than in northern France!
Match your destination to the level of crowds you want: don't go to Paris if you want deserted streets, and don't take a hiking trail in the middle of Spain if you're hoping for a group experience.
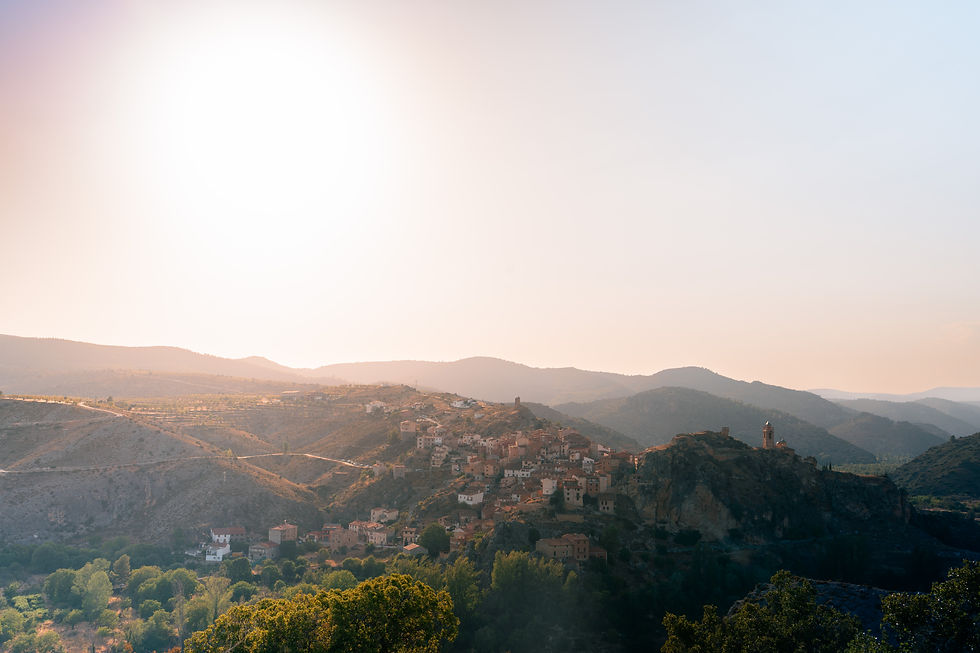
As for me, my partner and I chose a secluded spot in the middle of the Spanish mountains so we could enjoy the view (almost) all to ourselves. It took several days of scouting to make sure we’d have a clear view on the big day, and we found the perfect spot!
What technical aspects should you keep in mind when photographing an eclipse?
As mentioned earlier, there will be some variations depending on whether you want to take a close-up shot of the eclipse or a wide-angle shot.
Focal lenght
Let's start with the differences: To take a close-up of the sun, you'll need a long focal length, ideally 200mm or longer (full-frame). You'll find that these lenses are very expensive: a more affordable option is to rent one (but be sure to book it in advance), or to buy a lens designed for an APS-C sensor, which is a bit more affordable.
Since the sun moves quickly, you'll need to regularly adjust the angle of your camera to keep it in the frame, unless you already have a specialized accessory that does this for you. If you plan to stitch the photos together later, I recommend centering the sun as much as possible. It'll make your life easier!
For the wide-angle shot, a "standard" all-purpose lens should generally cover this range. I'd recommend choosing a focal length between 18mm and 50mm to capture enough of the scene, but the creative choice is up to you!
The goal here is to keep your frame still while the sun moves within the frame you've selected. If in doubt, shoot a slightly wider shot and zoom in during post-production.
To help you make your choice and get a better sense of the focal lengths, I invite you to check out this article, which includes a comparison image: https://www.blog.jimdoty.com/?p=16975
As for me, I couldn't decide, so I set up two cameras: one for close-ups and one to capture the entire scene.
Close-up of the total eclipse on August 12, 2026, in the Valencian Community, Spain. Wide shot of the sun during the total solar eclipse on August 12, 2026, in Spain
Solar protection
In either case, a solar filter is absolutely essential. Without one, it’s like watching an eclipse without glasses: the light will burn out your sensor, and you likely won’t be able to use your camera afterwards.
Be sure to buy it well in advance, because as the eclipse approaches, inventory levels are very low, and delivery times get much longer. You have two options:
a rigid solar filter: sturdy, it screws onto your lens just like a standard filter.
a flexible solar filter: unfortunately, it can be damaged more easily. It may get scratched or develop holes because the paper is very thin.
I tested both: the rigid one for my newest camera, and the flexible one for my oldest camera. Both worked perfectly, but I definitely won't be able to reuse the flexible filter, it looks all crumpled after use.
If you're just curious about this kind of photography, if you want to give it a try but aren't sure you'll enjoy it, I recommend a flexible filter, which is more affordable and should work very well for a one-time use. I used Baader AstroSolar sheets.
If you've had a long-standing interest in photography and are pretty sure you'll enjoy the experience, invest in a rigid filter. I chose the K&F Concept ND100000, and be sure to select the correct diameter for your lens.
Regardless of which option you choose, you must keep it on your camera at all times, in front of the lens, except during the total phase of the eclipse.
Long exposure
To best capture sunlight, it is recommended to use a long exposure: that is, to let the camera’s sensor be exposed to light for a considerable amount of time, ideally several seconds.
This means you must remain completely still for the entire duration of the exposure. To do this, you’ll need:
a tripod
a way to create a delay between when you take the photo and when the shutter actually fires, to avoid any camera shake caused by pressing the shutter button: either use the self-timer, which is usually built into the camera, or use a remote shutter release (via your phone or a remote control)
I used a tripod for each camera: you can find them at every price point. The more expensive ones generally have more options for adjusting the camera's angle, are heavier and therefore more stable, and are made of more durable materials, etc.
I didn't want to use a remote shutter release with my phone, so I could conserve battery life on both my camera and my phone. I used the standard 5-second self-timer, which worked perfectly.

Bracketing
Since the sun is a complex subject to photograph, with light that is much richer than what we usually photograph, it is also recommended to use the "bracketing" method. This involves taking several photos instead of just one: one exposed according to your settings, one underexposed, and one overexposed.
By merging all three in your photo editing software, you'll end up with a photo that contains much more information, giving you greater depth of color and light, and thus greater freedom in editing.
Since this was my first attempt, I decided not to use this method, as it would have increased the time I spent on post-production. Looking back, I now see the value in using it, because it would have given me more leeway with the color of the sun, which looks very white in my final image. I could have achieved a more orange hue by using this technique.
Auto or Manual Focus ?
You'll also notice that autofocus doesn't really work on objects that far away, so you'll need to use manual focus. To make this step easier, I strongly recommend using a monitor or a phone screen that's larger than your camera's screen.
Since I was far from home, I didn't want to burden myself with this extra accessory, but it would have really helped me nail the focus more easily.
Prepare an eclipse sequence
If you plan to stitch all the images together later, one setting that will make your life easier is adjusting the white balance: it allows you to set the color temperature correctly. By adjusting it manually, all your photos will have the same settings, and therefore the same color appearance, rather than having to correct this in your photo editing software.
If you want to take several photos, it's a good idea to space them out by 3 to 4 minutes: this will give you options during post-production, while ensuring there's enough variation between each photo in terms of the positions of the moon and the sun.
The camera is installed, now what?
Now that we've covered your camera settings, let's talk about the most important thing: you!
These recommendations are repeated before every eclipse, but unfortunately, there is a spike in visits to ophthalmologists after every eclipse due to vision problems.
A few essential safety reminders:
Always wear your eclipse glasses, except during the total eclipse phase, when you can safely remove them
Place the solar filter you've chosen for your camera in front of the lens (not behind it) whether you're using the screen or the viewfinder.
Above all: do not use binoculars, and do not look through your camera's viewfinder either. This will act like a magnifying glass on your retina and burn it even faster.
And once you've taken the photos, be sure to enjoy the live show, too! Don't just experience it through your camera.

How to build an eclipse sequence?
You've now taken all the photos you wanted, congratulations !
I’ll talk about my experience with Lightroom and Photoshop, which I believe are the most commonly used photo editing programs, but I know there are many others out there. Feel free to choose the one you’re most familiar with! If you don’t know where to start, I recommend checking out YouTube, which is often full of extremely helpful tutorials.
For my part, I started by sorting through my photos, then editing them in Lightroom (they were shot in RAW). I admit I didn’t follow any YouTube tutorials, since I’m used to editing my own photos and don’t particularly like the look of astrophotography images that are presented as “perfect.” I was looking for a more artistic look, rather than the high-contrast look I usually see. I usually create "soft" images (at least, that's the feedback I get very often) so I wanted to stick with that style on purpose.
To preserve the files in RAW format, I imported them from Lightroom into Photoshop and created two sequences: one of close-ups and one of wide shots. Since I had never done this kind of editing before, I followed this very well-explained tutorial: https://www.youtube.com/watch?v=X8Rzk9rhUcI
For close-ups, with the solar filter, your background will inevitably be completely black, so editing is fairly simple.

For wide-angle shots, your background will also always be black, except during the total eclipse when you’ll have removed the filter. I recommend using this photo, which shows both the scenery and the total eclipse, as a background onto which you can overlay your other photographs.
By making this choice, you’ll capture the exact lighting of the total eclipse with that very special atmosphere, rather than taking a photo at another time, either before or after the eclipse. Even if the setting is the same, the light won’t match the moment of the eclipse, and personally, I find that it doesn’t work quite as well.

I hope this article has been helpful in preparing for your next eclipse photo shoots. Who’s planning a trip for 2027?
Feel free to ask any questions in the comments!
Comments